How to Build and Maintain Your Own Vermicompost Bin
Written by Sydney Roncal & Chloe Hodge
1
Find a Bin
Many stackable, readymade vermicomposting systems are available for purchase online; however, it is easy to create your own using any kind of sturdy plastic bin. If you go the DIY route, remember to use a small bit to drill holes along the sides, top, and bottom of the bin for aeration and drainage.
2
Compile Bedding
Compile Bedding
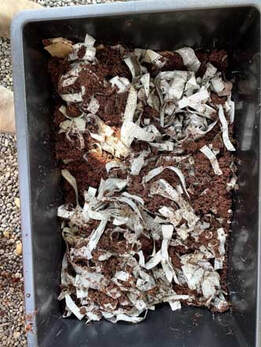
Bedding, the carbon content for the system, can be cut up newspaper (only black and white ink), dried leaves, cardboard, coconut coir (soil conditioner) or a mixture of all. Using your bedding of choice, create a thick layer along the bottom of the bin. Then, toss in a nice scoop of soil to add some bacteria to this system.
3
Add Worms & Food
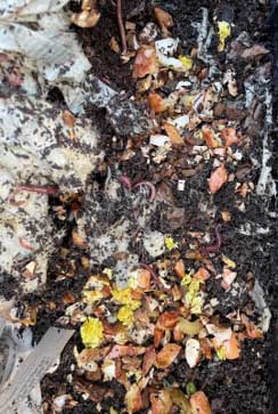
The final step is to add red wigglers to the bin. For a standard small bin, 1-2 pounds of these critters is usually plenty. Bury the worms in the bedding and be careful not to touch them. Finally, feed the worms with a generous handful of food scraps by burying them in a corner away from where the worms were buried. The worms will eventually disperse and move to the food source. In order to discourage the worms from escaping, cover the contents of the bin with a thin sheet of cardboard or a few pieces of newspaper.
Collecting and storing the right food scraps is an essential part of maintaining a compost system. A small worm bin will not consume as much as a compost pile or tumbler, but it is always helpful to have food waste handy. For a worm bin, avoid meat, dairy, lots of citrus, animal feces and oil soaked paper products. Worms can eat roughly half their weight a day so for example, feed ½ pound of food for 1 pound of worms.
4
Monitor the Process
Monitor the Process
Every compost system needs four things: air, water, carbon and nitrogen. Any troubleshooting within a compost system should involve adding more or less of the former four components. For instance, if food scraps seem to be molding, remove them and feed the worms less. If certain foods attract unwanted critters, take note and do not use that food again. Keep in mind the contents of the bin should be as wet as a lightly wrung out sponge and might need occasional watering.
5
Harvest Your Compost
Harvest Your Compost
A vermicompost system will produce sufficient compost “black gold” after 2-5 months of steady feeding. There are several different methods to harvesting based on the set up of your bin. Uncle Jim’s Worm Farm has a useful article outlining the four best methods. When your worm bin is ready to harvest, check out their website for all the tips and tricks. Using the worm castings is as simple as mixing it into potting soil to put in garden beds or sprinkle small handfuls as the base of vegetables and plants. Even if you do not have a garden, take your compost and spread it around the bases of neighborhood trees. Compost adds essential nutrients to the soil, allowing the plants to thrive.
A vermicompost system will produce sufficient compost “black gold” after 2-5 months of steady feeding. There are several different methods to harvesting based on the set up of your bin. Uncle Jim’s Worm Farm has a useful article outlining the four best methods. When your worm bin is ready to harvest, check out their website for all the tips and tricks. Using the worm castings is as simple as mixing it into potting soil to put in garden beds or sprinkle small handfuls as the base of vegetables and plants. Even if you do not have a garden, take your compost and spread it around the bases of neighborhood trees. Compost adds essential nutrients to the soil, allowing the plants to thrive.


